If you’re craving something sweet, you’ve come to the right place! This Nutella Fudge recipe combines creamy Nutella with rich chocolate and a touch of sea salt. In just a few simple steps, you’ll have a decadent treat that melts in your mouth. Perfect for sharing or indulging solo, this fudge is a must-try! Ready to make your taste buds dance? Let’s dive into the delicious details!
Why I Love This Recipe
- Decadent Flavor: This Nutella fudge is rich and creamy, combining the beloved hazelnut chocolate spread with smooth chocolate for a truly indulgent treat.
- Easy to Make: With just a few simple ingredients and minimal cooking time, this recipe is perfect for both novice and experienced bakers.
- Perfect for Sharing: Cut into bite-sized pieces, this fudge makes an excellent gift or treat to share at gatherings, making it a hit among friends and family.
- Customizable Toppings: Feel free to get creative with toppings! Chopped nuts, sprinkles, or a drizzle of caramel can elevate this fudge to the next level.
Ingredients
List of Ingredients Needed
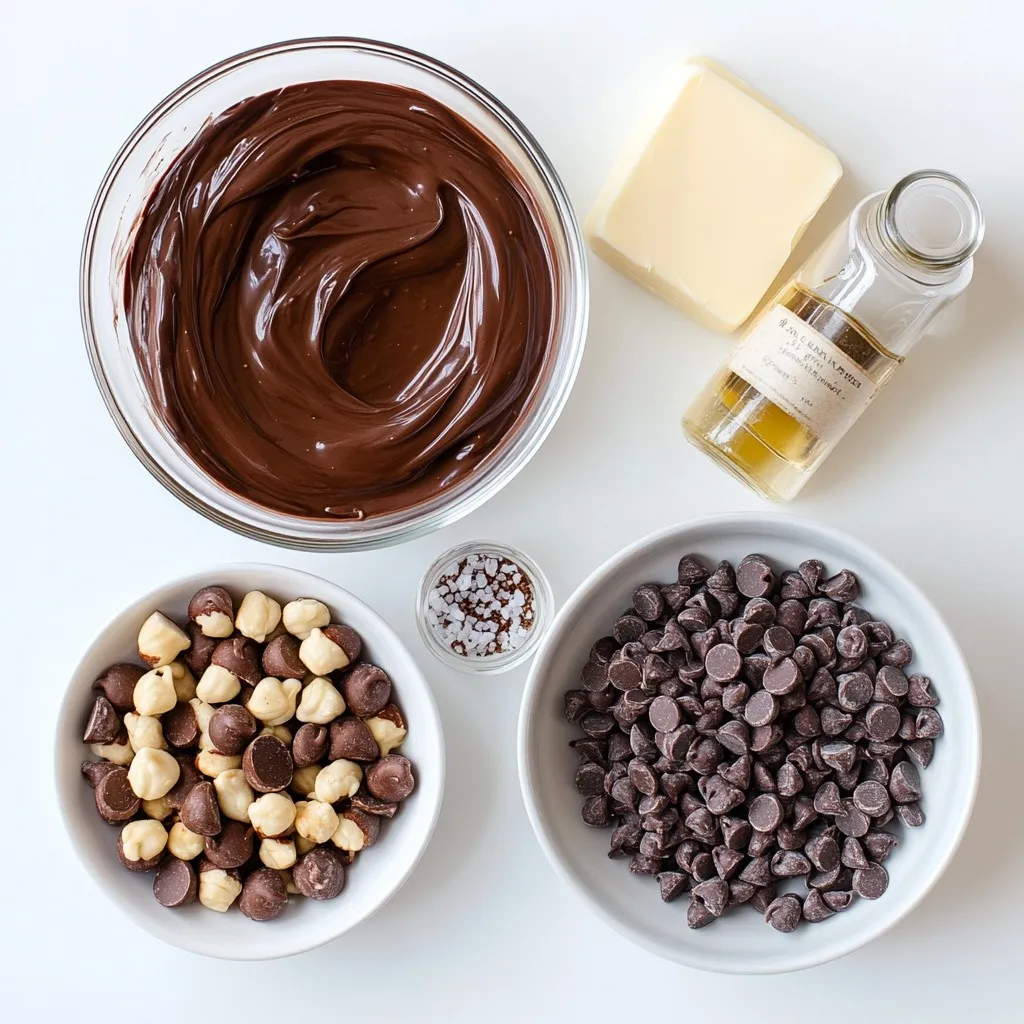
– 1 cup Nutella
– 1 cup sweetened condensed milk
– 2 tablespoons unsalted butter
– 1 cup semi-sweet chocolate chips
– 1 teaspoon vanilla extract
– Pinch of sea salt
– Chopped hazelnuts (for topping)
To make Nutella fudge, you need simple yet rich ingredients. Nutella brings a creamy texture and hazelnut flavor. Sweetened condensed milk adds sweetness and smoothness. Unsalted butter helps bind everything together. Semi-sweet chocolate chips give a deep chocolate taste. Vanilla extract enhances the flavors, while sea salt adds a nice contrast. Lastly, the chopped hazelnuts on top add crunch and beauty.
Each ingredient plays a key role in creating this treat. Always use high-quality Nutella for the best flavor. The semi-sweet chocolate chips should melt easily, ensuring a smooth fudge. Fresh hazelnuts will give the best texture and taste.
Feel free to mix these ingredients in your kitchen. You can adjust the toppings, but I recommend trying the chopped hazelnuts first. They really elevate the fudge.
Step-by-Step Instructions
Prepare the Baking Dish
Start by lining an 8×8 inch baking dish with parchment paper. Make sure to leave some paper hanging over the edges. This extra paper helps you lift the fudge out later.
Melting the Base
Next, grab a medium saucepan and place it on low heat. Add in 1 cup of Nutella, 1 cup of sweetened condensed milk, and 2 tablespoons of unsalted butter. Stir the mix constantly until the butter melts and everything blends well.
Incorporating Chocolate
Now it’s time to add 1 cup of semi-sweet chocolate chips to the pan. Keep stirring until the chocolate chips melt completely. You want a smooth and creamy mixture without lumps.
Final Touches
Once melted, take the pan off the heat. Stir in 1 teaspoon of vanilla extract and a pinch of sea salt. This step adds great flavor to your fudge.
Adding Toppings
Pour the fudge mixture into your prepared baking dish. Use a spatula to spread it evenly. Then, sprinkle chopped hazelnuts over the top. Press them down gently to make sure they stick well.
Setting the Fudge
Now it’s time to let the fudge set. Place the dish in the refrigerator for at least 2 hours. Check the texture before you cut it. It should feel firm and not sticky.
Tips & Tricks
Perfecting Your Fudge
Ensuring the Right Consistency
To get the best fudge, you need the right mix. The fudge should feel smooth and creamy. If it’s too thick, it won’t set right. Always stir the mix until all the chocolate melts. Keep the heat low to avoid burning.
Avoiding Graininess in Mixture
Grainy fudge is a no-go! To avoid this, make sure to mix your ingredients well. Use fresh, quality chocolate chips. This helps create a silky texture. If you find lumps, keep stirring until everything is smooth.
Presentation Tips
Serving Suggestions on Decorative Plates
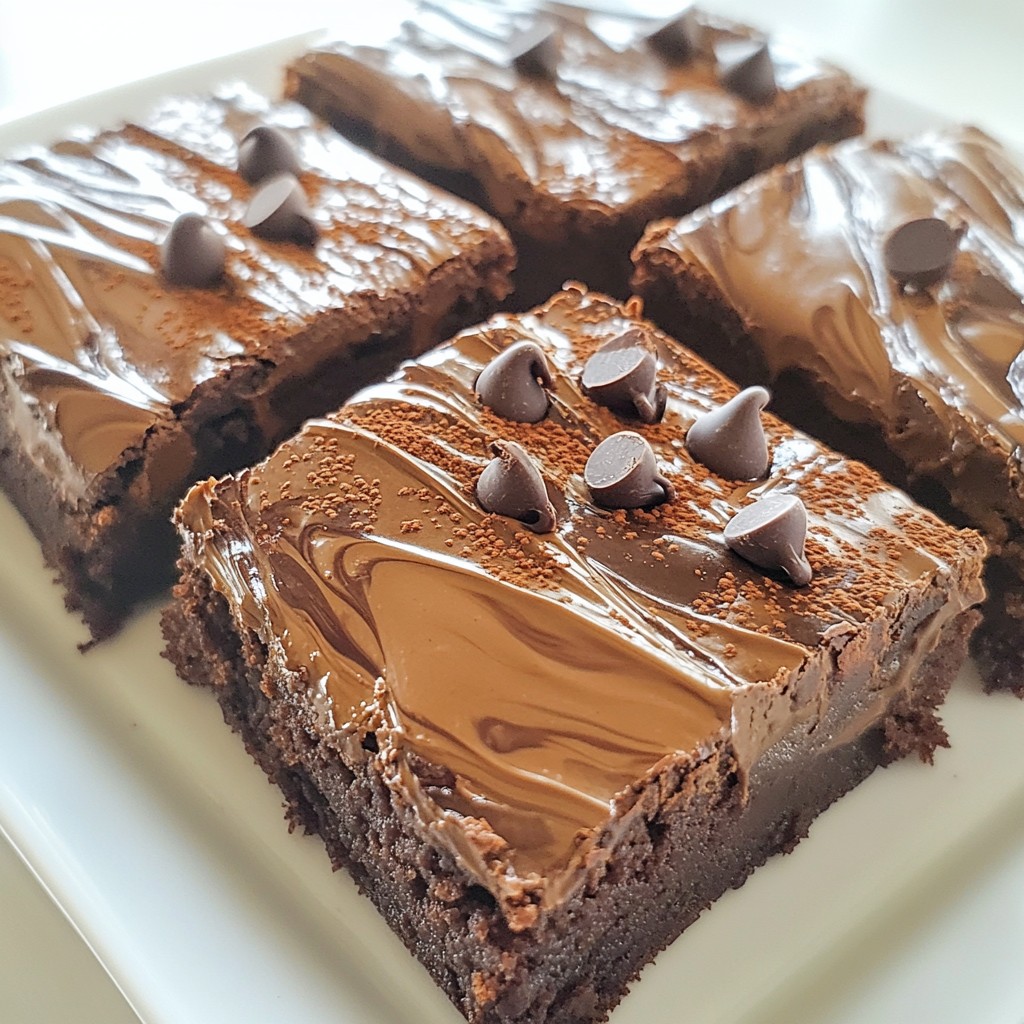
When it’s time to serve, use a nice plate. A colorful or fancy plate makes your fudge look special. Cut the fudge into small squares for easy serving. Arrange them neatly for a beautiful display.
Drizzling with Melted Chocolate for Appeal
To make your fudge even more tempting, drizzle melted chocolate on top. This adds a fancy touch. You can use dark, white, or milk chocolate. It not only looks great but also adds rich flavor.
Customization Options
Adding Different Toppings (e.g., Sprinkles)
Get creative with your toppings! You can add fun sprinkles or colorful candies. This makes the fudge more fun, especially for kids. Just sprinkle them on top before the fudge sets.
Using Various Types of Nuts
If you love nuts, try different kinds! Chopped almonds, walnuts, or pecans add crunch. Just make sure to press them into the fudge so they stick. This adds flavor and texture to each bite.
Pro Tips
- Use Quality Ingredients: The flavor of your fudge directly depends on the quality of the Nutella and chocolate chips you use. Opt for premium brands for the best taste.
- Experiment with Add-ins: Feel free to add other ingredients like sea salt flakes, crushed Oreos, or dried fruits for a unique twist on the classic fudge.
- Storing Fudge: Keep the fudge in an airtight container at room temperature for up to a week, or refrigerate for longer shelf life. Just remember to let it come to room temperature before serving.
- Cutting Tips: For clean cuts, use a sharp knife dipped in hot water. Wipe the knife between cuts to maintain neat edges on your fudge squares.
Variations
Nut-Free Option
If you need a nut-free option, you can swap out Nutella for a different spread. Look for a hazelnut spread that does not contain nuts. Make sure it has a similar texture and taste. This way, you still get that creamy, chocolaty goodness without the nuts.
Flavor Additions
Incorporating Coffee or Espresso Powder
Want to kick up the flavor? Add a little coffee or espresso powder to your fudge mix. Just one teaspoon will give your fudge a rich, bold taste. It pairs perfectly with the sweetness of Nutella.
Using Flavored Extracts for Unique Taste
You can also try flavored extracts to change the taste. Almond, orange, or mint extracts work great. Just a few drops can transform your fudge into something special. Be careful not to add too much, or it may overpower the fudge.
Serving Styles
Making Fudge Brownies or Fudge Bars
You can turn your fudge into fudge brownies or bars. After pouring it into the baking dish, let it set. Then, cut it into squares or rectangles for easy serving. These bars are perfect for parties or snacks.
Creating Layered Fudge with Other Flavors
Another fun idea is to create layered fudge. Pour one layer of the Nutella fudge and let it set slightly. Then, add another layer of a different flavor, like peanut butter or vanilla. This makes a colorful and tasty treat that looks great on a plate.
Storage Info
Recommended Storage Methods
Store your Nutella fudge in an airtight container. This keeps it fresh and tasty. You can also use plastic wrap if you don’t have a container. Make sure to press the wrap against the fudge to minimize air exposure. This helps prevent drying out or getting hard.
For refrigeration, place the fudge in the fridge. The cool air helps to maintain its soft texture. Avoid storing it near strong-smelling foods. Fudge can absorb those odors, which changes its flavor.
Shelf Life
Nutella fudge lasts about two weeks in the fridge. Keep it sealed well to ensure it stays fresh. If you want it to last longer, consider freezing it. When frozen, fudge can last up to three months. Wrap it tightly in plastic wrap before placing it in a freezer bag. This protects it from freezer burn.
Reheating Tips
If your fudge is too hard, you can soften it. Place a piece of fudge on a plate. Microwave it for about 10 seconds. Check the softness and repeat if needed. Be careful not to overheat; you want it soft but not melted.
For safe reheating, avoid using a stovetop. This can lead to uneven heating. Instead, stick with the microwave. It’s quick and easy, making your fudge gooey again. Enjoy your sweet treat!
FAQs
How do I know when my fudge is set?
You can tell fudge is set by these signs:
– It feels firm to the touch.
– The surface is not sticky anymore.
– It holds its shape when you press lightly.
After chilling for at least 2 hours, check these signs before cutting. This ensures that your fudge will not fall apart. If it still feels soft, give it more time in the fridge.
Can I add ingredients to the fudge mix?
Yes, you can customize your Nutella fudge! Here are some ideas:
– Add chopped nuts for crunch.
– Mix in mini marshmallows for sweetness.
– Sprinkle in sea salt for a salty twist.
Feel free to experiment with flavors and textures. This allows you to make the fudge truly your own. Remember to keep the basic recipe in mind for best results.
Is Nutella fudge gluten-free?
Nutella fudge is generally gluten-free. Here’s a quick breakdown:
– Nutella: gluten-free.
– Sweetened condensed milk: gluten-free.
– Semi-sweet chocolate chips: check the label for gluten-free status.
Always read labels to ensure safety. If you need a gluten-free option, this fudge fits the bill!
What can I serve with Nutella fudge?
Nutella fudge pairs well with many treats:
– Serve with fresh fruit like strawberries or bananas.
– Pair it with vanilla ice cream for a delicious contrast.
– Enjoy it with a hot cup of coffee or milk.
These pairings enhance the rich flavors of the fudge. They also make for a fun dessert experience!
This blog post covered how to make delicious Nutella fudge. We discussed key ingredients, like Nutella and chocolate chips, and provided simple steps to create this treat. Tips helped perfect your fudge’s taste and texture. You also learned about variations and how to store your fudge for freshness. Trust me; it’s easy to customize. Enjoy making this recipe and share it with others. You’ll impress everyone with your fudge-making skill