Craving a tasty treat that’s perfect for fall? You’ll love these Mini Pumpkin Cheesecakes! They’re easy to make and bursting with flavor. In this guide, I’ll walk you through the simple steps, must-have ingredients, and helpful tips to create these delightful bites. Perfect for gatherings or a cozy night in, these cheesecakes promise smiles all around. Let’s dive into baking up some deliciousness!
Why I Love This Recipe
- Deliciously Festive: These mini pumpkin cheesecakes capture the essence of fall with their rich pumpkin flavor and warm spices, making them perfect for autumn gatherings.
- Easy to Make: The straightforward steps mean you can whip these up quickly, even if you’re a beginner baker. They’re simple yet impressive!
- Perfect Portions: Each mini cheesecake is just the right size for a sweet treat, allowing guests to indulge without overdoing it.
- Customizable Toppings: With the option to add whipped cream and cinnamon, you can customize each cheesecake to suit your taste and presentation style.
Ingredients
Detailed List of Ingredients
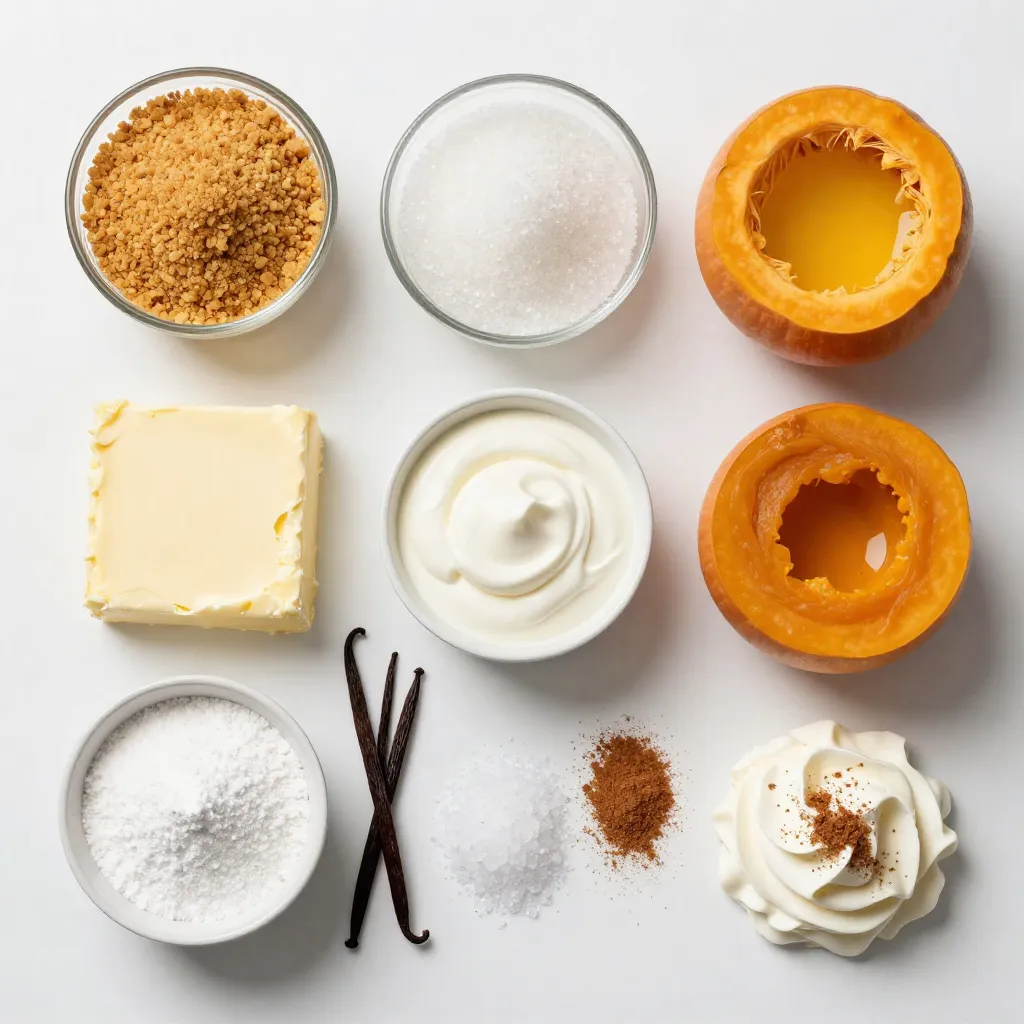
For these mini pumpkin cheesecakes, gather the following items:
– 1 cup graham cracker crumbs
– 1/4 cup granulated sugar
– 1/2 cup unsalted butter, melted
– 8 oz cream cheese, softened
– 1/2 cup canned pumpkin puree
– 1/4 cup sour cream
– 1/2 cup powdered sugar
– 1 teaspoon vanilla extract
– 1 teaspoon pumpkin pie spice
– 1/4 teaspoon salt
– Whipped cream, for topping
– Ground cinnamon, for garnish
These simple ingredients work together to create a rich, creamy dessert. The graham cracker crumbs make a nice crust, while the pumpkin gives a warm flavor.
Ingredient Substitutions
You might not have all the ingredients. Here are some swaps:
– Graham cracker crumbs: Use digestive biscuits or vanilla wafers.
– Granulated sugar: Substitute with brown sugar for a deeper flavor.
– Unsalted butter: You can use coconut oil for a dairy-free option.
– Cream cheese: Try using ricotta cheese for a lighter texture.
– Sour cream: Greek yogurt works in place of sour cream.
– Powdered sugar: Blend granulated sugar until fine if you lack powdered sugar.
– Pumpkin pie spice: Combine cinnamon, nutmeg, and ginger if you don’t have it.
These swaps keep the recipe tasty while offering flexibility in your pantry.
Tools Needed
To make these mini cheesecakes, you will need:
– Muffin tin
– Muffin liners
– Mixing bowls
– Electric mixer or whisk
– Measuring cups and spoons
– Rubber spatula
– Cooling rack
Having the right tools helps make the process easy and fun. Each tool plays a role in creating your delightful mini cheesecakes.
Step-by-Step Instructions
Preparing the Oven and Muffin Tin
First, preheat your oven to 325°F (160°C). This helps the mini cheesecakes bake evenly. Next, line a 12-cup muffin tin with cupcake liners. The liners make it easy to remove the cheesecakes later.
Making the Crust
In a medium bowl, mix 1 cup of graham cracker crumbs, 1/4 cup of granulated sugar, and 1/2 cup of melted unsalted butter. Stir until the mixture is well combined. Press about 1 tablespoon of this mixture firmly into the bottom of each muffin cup. This forms a tasty base for your cheesecake.
Preparing the Cheesecake Filling
In a separate bowl, beat 8 oz of softened cream cheese until it is smooth. Add in 1/2 cup of canned pumpkin puree, 1/4 cup of sour cream, 1/2 cup of powdered sugar, 1 teaspoon of vanilla extract, 1 teaspoon of pumpkin pie spice, and 1/4 teaspoon of salt. Mix everything until it is creamy and well blended. This filling gives the cheesecakes their rich pumpkin flavor.
Baking the Mini Cheesecakes
Spoon the cheesecake filling into each muffin cup, filling them about 2/3 full. Place the muffin tin in the preheated oven. Bake for about 18-20 minutes. You want the edges to set, but the centers should still jiggle a bit. This ensures a smooth texture.
Cooling and Chilling Steps
After baking, turn off the oven and open the door slightly. Let the cheesecakes cool in the oven for about 10 minutes. This slow cooling helps prevent cracks. After that, move them to a wire rack to cool completely. Once cooled, place them in the fridge for at least 2 hours. This helps them firm up and enhances their flavor.
Final Touches Before Serving
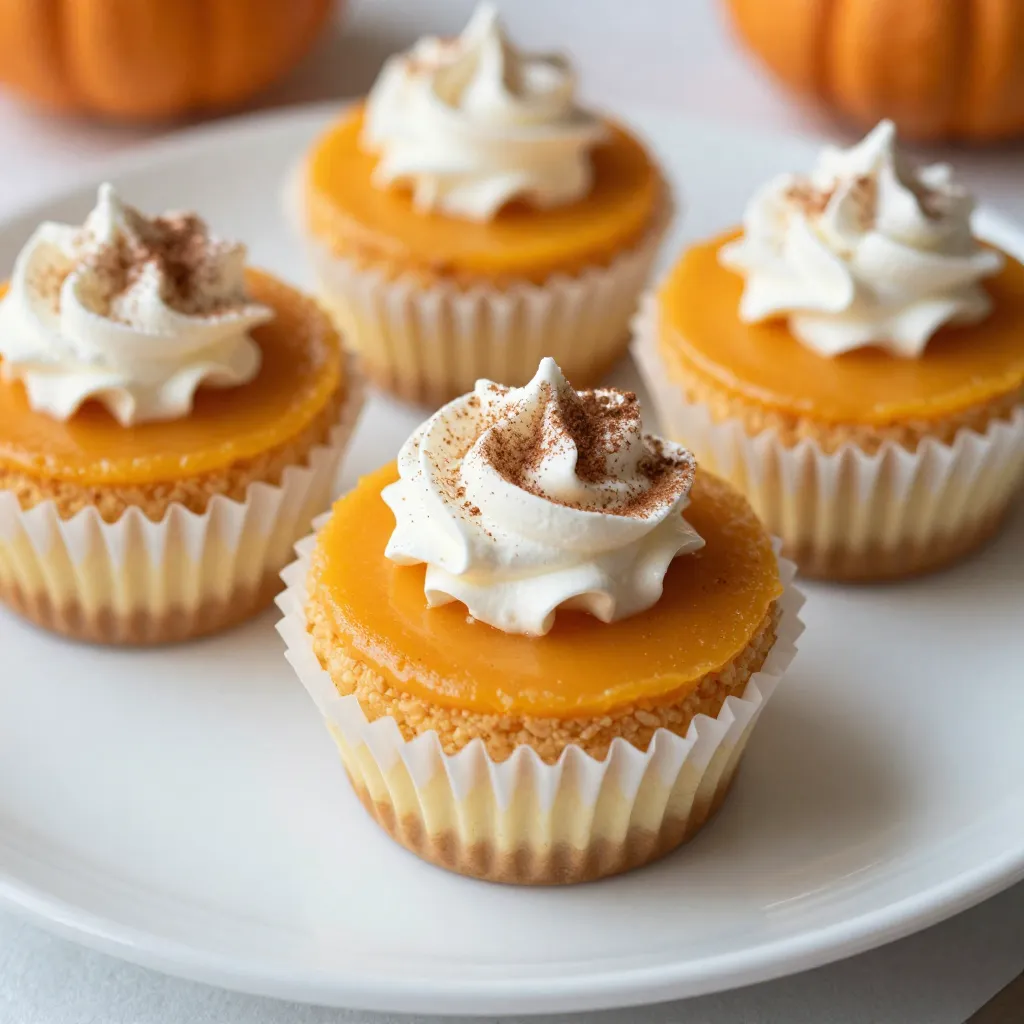
Before serving, add a dollop of whipped cream on each mini cheesecake. Sprinkle a bit of ground cinnamon over the top for extra flavor. Serve these delightful treats on a pretty plate, perhaps with some pumpkin seeds or candied nuts for decoration. They look beautiful and taste amazing!
Tips & Tricks
Common Mistakes to Avoid
One mistake is overmixing the filling. This can add too much air. Air causes cracks. Mix just until smooth. Another common issue is baking too long. The center should jiggle slightly. Remove them when the edges are set but the middle is soft. Lastly, don’t skip chilling time. Chilling helps set the texture.
How to Achieve the Perfect Cheesecake Texture
For a smooth texture, ensure your cream cheese is at room temperature. Mix it well before adding other ingredients. Blend in the pumpkin puree and sour cream gently. This keeps the mixture creamy and light. The key to a perfect cheesecake is low and slow baking. Bake at 325°F for even cooking. Let them cool gradually in the oven after baking.
Enhancements for Flavor and Presentation
Use fresh spices for a stronger pumpkin flavor. Rather than store-bought pumpkin pie spice, try mixing cinnamon, nutmeg, and ginger. For a twist, add a splash of maple syrup. This enhances sweetness and depth. Presentation matters too! Top each cheesecake with whipped cream. A sprinkle of cinnamon or crushed nuts adds visual appeal. Serve them on a nice platter for a festive touch.
Pro Tips
- Use Room Temperature Ingredients: Make sure your cream cheese and sour cream are at room temperature before mixing. This helps achieve a smoother and creamier filling.
- Don’t Overbake: The cheesecakes should still have a slight jiggle in the center when you take them out of the oven. They will firm up as they cool.
- Chill Thoroughly: Allow the mini cheesecakes to chill in the refrigerator for at least 2 hours before serving to ensure they set properly and enhance the flavors.
- Garnish Creatively: Elevate your presentation by adding a dollop of whipped cream and a sprinkle of ground cinnamon or even some candied pecans for added texture and flavor.
Variations
Gluten-Free Version
To make a gluten-free mini pumpkin cheesecake, swap regular graham cracker crumbs for gluten-free ones. Many brands offer great options. You can also use almond flour or crushed nuts for the crust. Just mix them with butter and sugar, just like in the original recipe. This way, everyone can enjoy these tasty treats!
Different Flavors or Mix-Ins
You can get creative with flavors! Try adding chocolate chips for a sweet twist. Swapping pumpkin puree for other purees, like sweet potato or butternut squash, can give a new taste. You can also mix in spices like nutmeg or allspice for extra warmth. Each change makes your cheesecakes unique.
Alternative Toppings and Garnishes
Toppings can change the whole look and taste of your mini cheesecakes. Instead of whipped cream, try a dollop of cream cheese frosting for a richer flavor. You can also use caramel sauce or chocolate drizzle for sweetness. Sprinkle crushed nuts or crushed cookies on top for crunch. Each topping adds a fun touch!
Storage Information
Best Practices for Storing Mini Cheesecakes
Store your mini pumpkin cheesecakes in the fridge. Use an airtight container to keep them fresh. Make sure they cool completely before sealing. This helps prevent sogginess and keeps the flavors intact. If you plan to serve them later, wait to add toppings until just before serving. This keeps the whipped cream from getting soggy.
How to Freeze Mini Cheesecakes
To freeze your mini cheesecakes, first cool them fully in the fridge. Once cool, wrap each cheesecake tightly in plastic wrap. Then place them in a freezer-safe container or bag. Label the container with the date. These cheesecakes can last up to three months in the freezer. When ready to eat, thaw them in the fridge overnight.
Shelf Life and Serving Suggestions
Mini pumpkin cheesecakes are best enjoyed fresh but can last about five days in the fridge. For serving, add a dollop of whipped cream and sprinkle with ground cinnamon for a festive touch. You can also add a sprinkle of chopped nuts or chocolate shavings for extra flair. These small treats are perfect for gatherings or cozy nights in!
FAQs
How do I know when mini cheesecakes are done?
You can tell mini cheesecakes are done when the edges feel firm. The center should jiggle slightly but not appear liquid. This means they are set but still creamy. After baking, let them cool in the oven. This step helps avoid cracks.
Can I use fresh pumpkin instead of canned?
Yes, you can use fresh pumpkin. Just be sure to cook and puree it first. Fresh pumpkin has great flavor and works well in this recipe. Make sure to drain excess moisture for the best texture.
How long do pumpkin cheesecakes last in the fridge?
Pumpkin cheesecakes last about 4 to 5 days in the fridge. Store them in an airtight container to keep them fresh. If you want to enjoy them later, consider freezing them for longer storage.
What can I substitute for sour cream?
You can use Greek yogurt as a substitute for sour cream. It offers a similar tangy flavor and creamy texture. Another option is to use cream cheese blended with a little milk for a smoother consistency.
Can I make this recipe ahead of time?
Yes, you can make these mini cheesecakes ahead of time. They chill nicely in the fridge. Prepare them a day before your event for the best flavor. Just add the whipped cream and garnish right before serving for a fresh look.
In this blog post, we covered how to make delicious mini cheesecakes. We discussed the key ingredients, substitutions, and tools you need. I laid out step-by-step instructions, from mixing the crust to the final touches. We explored tips to avoid common mistakes and how to enhance flavor. Plus, I shared variations, storage tips, and answered common FAQs.
Now, you’re ready to whip up your own mini cheesecakes. Enjoy experimenting and delighting your friends and famil