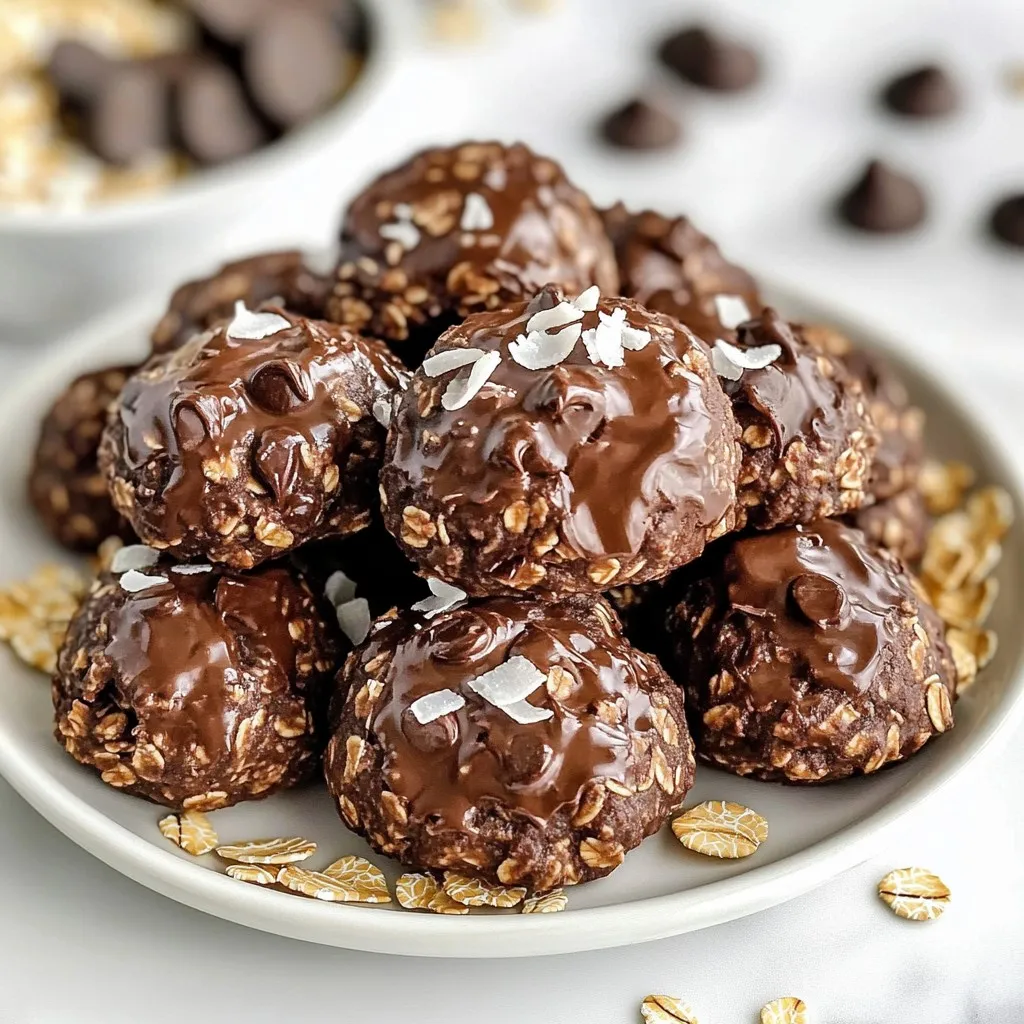
Craving a sweet treat but short on time? No-bake chocolate oatmeal cookies are your answer! These simple and tasty cookies require just a few ingredients. With creamy peanut butter, rich cocoa, and a touch of honey, you’ll whip up a batch in no time. Perfect for kids and adults alike, they satisfy your chocolate cravings without the heat of the oven. Let’s dive into this easy recipe!
Why I Love This Recipe
- Quick and Easy: This recipe takes only 10 minutes to prepare, making it perfect for a last-minute treat.
- Nutritious Ingredients: Packed with rolled oats and peanut butter, these cookies provide a satisfying energy boost.
- Customizable: Feel free to add your favorite mix-ins like nuts, dried fruit, or different types of chocolate!
- No Baking Required: Skip the oven and enjoy a delicious treat that sets perfectly in the fridge.
Ingredients
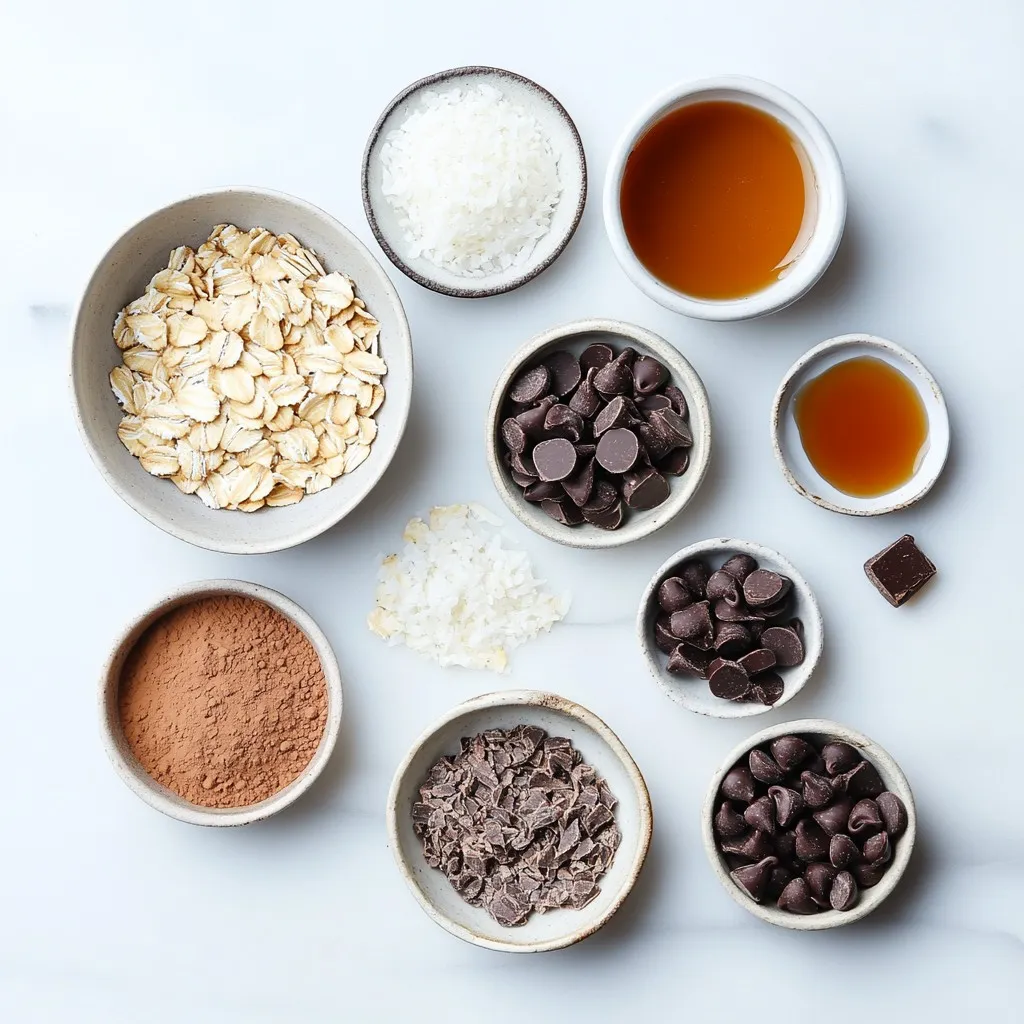
To make no-bake chocolate oatmeal cookies, you need simple ingredients. Each one plays an important role in making these treats taste amazing. Here’s what you will need:
– 1 cup rolled oats
– 1/2 cup creamy peanut butter
– 1/2 cup unsweetened cocoa powder
– 1/2 cup honey or maple syrup
– 1/4 cup coconut oil, melted
– 1 teaspoon vanilla extract
– 1/4 teaspoon salt
– 1/2 cup dark chocolate chips
– Optional: 1/4 cup shredded coconut for added texture
Each ingredient brings its own flavor and texture. The rolled oats give a hearty bite, while the cocoa powder adds rich chocolate taste. Creamy peanut butter binds everything together and enhances the flavor. Honey or maple syrup adds sweetness and moisture, making the cookies soft. Coconut oil helps keep the cookies smooth and rich.
You can also add shredded coconut if you want some chewiness. Dark chocolate chips provide little bursts of chocolate goodness in every bite. This mix of ingredients makes for a simple yet tasty treat. Enjoy gathering these ingredients; they will turn into something special!
Step-by-Step Instructions
Preparation of Dry Ingredients
Start by grabbing a medium bowl. Add 1 cup of rolled oats and 1/2 cup of unsweetened cocoa powder. Mix them together well. This ensures you get a nice chocolate flavor in every bite. Next, sprinkle in 1/4 teaspoon of salt. The salt enhances the sweetness and balances the flavors. Mix it all again until everything is combined.
Making the Wet Mixture
Now, let’s make the wet mixture. In a microwave-safe bowl, add 1/2 cup of creamy peanut butter, 1/2 cup of honey or maple syrup, and 1/4 cup of melted coconut oil. Heat this in the microwave for about 30 seconds. You want it warm and easy to stir. Carefully mix until it’s smooth and creamy. Then, add 1 teaspoon of vanilla extract and stir again until blended.
Combining Wet and Dry Ingredients
Pour the warm wet mixture over your dry oats mixture. Use a spatula or wooden spoon to mix everything together. You want to coat the oats fully with the chocolate-peanut butter mixture. This step is crucial for flavor and texture. If you like, gently fold in 1/2 cup of dark chocolate chips and 1/4 cup of shredded coconut. This adds extra flavor and a fun texture.
Forming the Cookies
Next, prepare a baking sheet by lining it with parchment paper. This helps prevent sticking. Using a tablespoon or cookie scoop, drop generous spoonfuls of the mixture onto the parchment. Lightly press down each scoop to form a cookie shape. Make sure they are evenly spaced so they don’t stick together.
Chilling the Cookies
Now it’s time to chill your cookies. Place the baking sheet in the refrigerator for 30 minutes to 1 hour. This helps the cookies firm up and hold their shape. For best results, don’t rush this step. Once they are set, you can enjoy your no-bake treats!
Tips & Tricks
Storage and Freshness
Store your no-bake cookies in an airtight container. This keeps them fresh and tasty. The ideal temperature is cool, like your fridge. These cookies stay good for about one week. If you want to keep them longer, you can freeze them.
Perfecting Texture
For a chewier cookie, add a bit more peanut butter. If you like it firmer, use less honey or syrup. Mixing well is key. Make sure every oat gets coated. If the mix feels too dry, a splash of water can help bind it together.
Enhancements and Add-ins
You can get creative with your cookies! Try adding nuts, like chopped almonds or walnuts. You can also use sunflower seed butter instead of peanut butter. For a fun twist, throw in some dried fruit or seeds. This adds flavor and texture to your treats.
Pro Tips
- Use Natural Sweeteners: Consider using maple syrup for a unique flavor twist that pairs beautifully with chocolate.
- Experiment with Mix-Ins: Add chopped nuts or dried fruits to the mixture for added texture and flavor.
- Control the Texture: If you prefer chewy cookies, reduce the chilling time slightly; for firmer cookies, chill them longer.
- Storage Tips: Keep the cookies in an airtight container in the refrigerator to maintain freshness for up to one week.
Variations
Flavor Variations
You can change the taste of these cookies by adding spices or extracts. Try adding 1/2 teaspoon of cinnamon or nutmeg for a warm flavor. These spices make your cookies smell great and taste even better. You can also integrate different extracts, like almond or coconut. A few drops can bring a fun twist to your cookies.
Dietary Adaptations
For those who need gluten-free options, use certified gluten-free oats. This ensures you can enjoy the cookies without worry. If you want to make these cookies vegan, substitute honey with maple syrup. You can also choose nut butters like sunflower seed butter for a nut-free option.
Serving Suggestions
Pair your cookies with cold milk or a plant-based milk like almond or oat milk. This makes a tasty snack. For gatherings, arrange the cookies on a bright plate. Scatter extra chocolate chips or shredded coconut around them. This adds color and makes the cookies look inviting.
Storage Info
Best Storage Practices
To keep your no-bake chocolate oatmeal cookies fresh, use airtight containers. These containers prevent air from getting in and drying them out. If you don’t have one, ziplock bags work well too. Just make sure to remove as much air as you can before sealing.
Store the cookies in the fridge for longer freshness. They can also sit at room temperature for a few days. If you choose room temperature, make sure they are away from heat and sunlight. This helps maintain their soft texture.
Freezing Instructions
To freeze your cookies, let them cool completely first. Then, place them in a single layer on a baking sheet. Freeze them for about an hour. Once frozen, transfer the cookies to an airtight container or ziplock bag. This step prevents them from sticking together.
When you want to enjoy a cookie, take it out and let it thaw at room temperature. For quicker results, you can microwave them for a few seconds. This helps restore their soft texture.
Signs of Spoilage
Look for a few signs to know if your cookies are no longer fresh. If they smell off or have a dry texture, it’s time to toss them. Check for discoloration or mold as well. These are clear signs that they have expired.
Always make sure to check the cookies before serving. This is especially important if they have been sitting out for a while. Keeping them stored properly helps you enjoy them longer.
FAQs
Can I substitute honey with something else?
Yes, you can. If you want a different sweetener, use maple syrup or agave nectar. These options give a similar sweetness and keep the cookies moist. You can also try brown rice syrup for a thicker texture. Just keep the amount the same as the honey.
How long do these cookies last?
These cookies last about a week when stored properly. Keep them in an airtight container at room temperature. If you want them to last longer, place them in the fridge. They can stay fresh for up to two weeks that way.
What if my mixture is too dry?
If your mixture feels dry, try adding a bit more coconut oil or honey. This will help the ingredients stick together better. Mix well after adding. If it is still dry, add a teaspoon of warm water. This should help achieve the right consistency.
Can I make these cookies nut-free?
Absolutely! To make these cookies nut-free, swap the peanut butter for sunflower seed butter or soy nut butter. Both options give a similar creamy texture. They will also keep your cookies tasty and safe for nut allergies.
In this post, we explored a simple recipe for no-bake cookies. We covered the key ingredients, step-by-step instructions, tips for perfect texture, and exciting variations. You now have the tools to make delicious treats that fit your taste and dietary needs. Remember, these cookies are easy to store and customize. Enjoy crafting your treats with the joy of creativity. Happy bakin