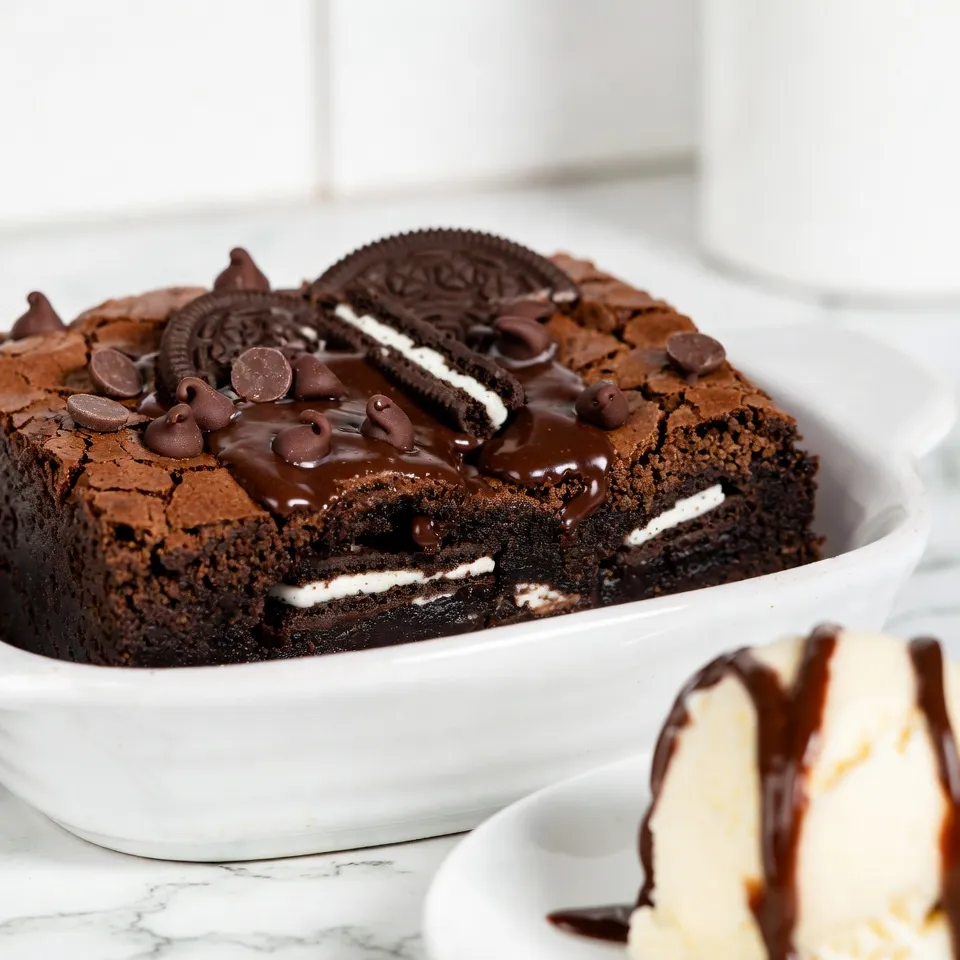
If you love brownies and Oreos, you’re in for a treat! Oreo Stuffed Brownies are a rich, chocolatey delight that combines two favorites into one gooey dessert. With simple ingredients and easy steps, I’ll guide you through making this delicious dessert. Get ready to impress your friends and family with this tastiness that everyone will love! Let’s dive into the sweet world of Oreo stuffed goodness.
Why I Love This Recipe
- Decadent Flavor: The combination of rich chocolate brownie and creamy Oreo filling creates an irresistible treat that satisfies any sweet tooth.
- Easy to Make: With simple ingredients and straightforward steps, these brownies are perfect for bakers of all skill levels.
- Impressive Presentation: Topped with Oreos and chocolate chips, these brownies look as good as they taste, making them ideal for parties.
- Fun for Everyone: These brownies are a hit with both kids and adults, making them a great dessert for family gatherings or celebrations.
Ingredients
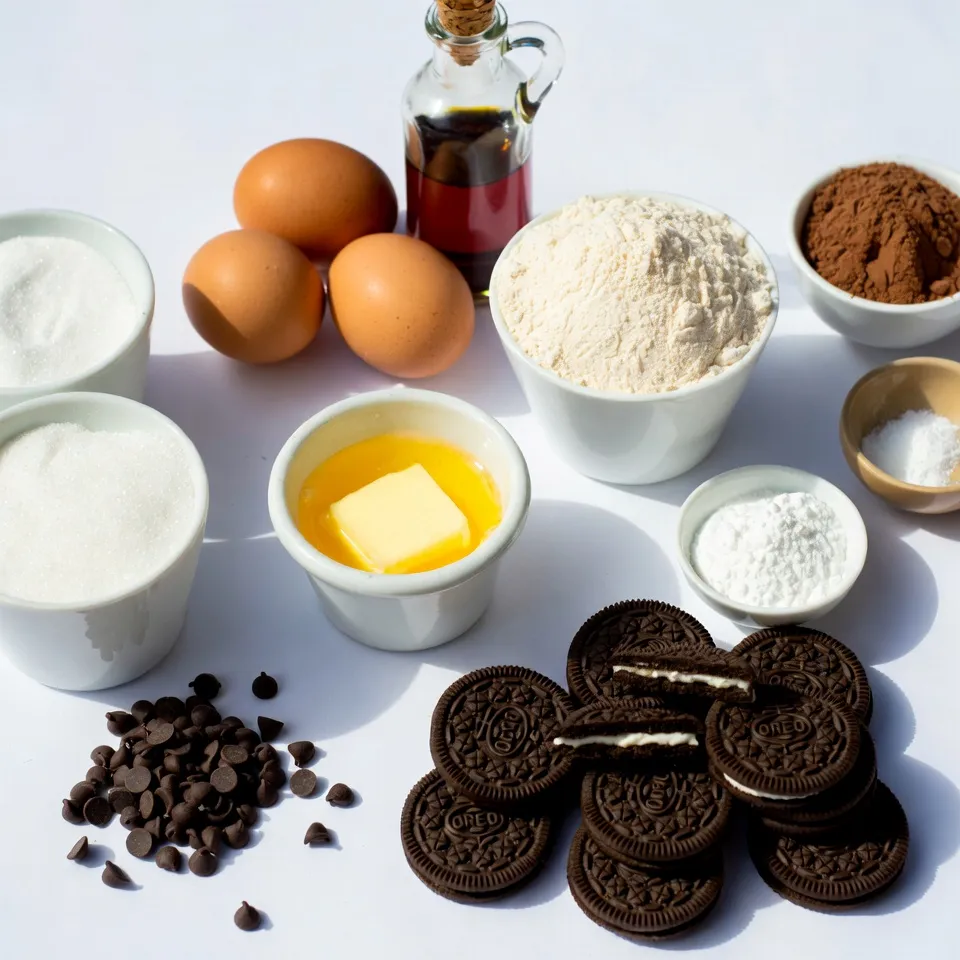
Detailed ingredient list for Oreo Stuffed Brownies
To make Oreo stuffed brownies, you’ll need the following:
– 1 cup unsalted butter, melted
– 2 cups granulated sugar
– 4 large eggs, room temperature
– 1 teaspoon vanilla extract
– 1 cup all-purpose flour
– 1/2 cup unsweetened cocoa powder
– 1/2 teaspoon salt
– 1/2 teaspoon baking powder
– 20 Oreo cookies, split in half (10 whole cookies)
– 1/2 cup chocolate chips (optional, for added richness)
These ingredients create a rich and chocolatey treat. The melted butter gives a nice texture. The sugar adds sweetness, while the cocoa powder packs a chocolate punch.
Importance of using room temperature eggs
Using room temperature eggs is key for making the best brownies. When eggs are at room temperature, they mix better with other ingredients. This helps to create a smooth batter. A smooth batter leads to even baking and a fudgy texture. Cold eggs can make your brownies dense and heavy.
Optional ingredients for added richness
If you want your brownies to be even richer, add chocolate chips. They melt during baking, creating gooey pockets of chocolate. You can also try adding nuts or different types of cookies. These options allow you to personalize your brownies. Experiment to find your perfect mix!
Step-by-Step Instructions
Preparation steps for the baking dish
Start by preheating your oven to 350°F (175°C). This ensures even baking. Grease a 9×13-inch baking dish with cooking spray. You can also line it with parchment paper. This makes it easy to lift the brownies out later.
Mixing the wet ingredients: Butter and sugar
In a large bowl, combine 1 cup of melted butter with 2 cups of granulated sugar. Whisk them together until the mix is smooth. It’s key to blend them well. This step helps create a rich base for your brownies.
Combining dry ingredients without lumps
In another bowl, sift 1 cup of all-purpose flour, 1/2 cup of unsweetened cocoa powder, 1/2 teaspoon of salt, and 1/2 teaspoon of baking powder. Sifting makes sure there are no lumps. It helps to mix the dry ingredients evenly.
Layering the Oreo cookies and brownie batter
Pour half of the brownie batter into your baking dish. Spread it evenly. Next, place 10 halves of Oreo cookies on top, cream side facing up. If you want, sprinkle half of the chocolate chips over them for extra flavor. Carefully spoon the rest of the brownie batter over the Oreos, covering them well.
Baking time and doneness tips
Bake your brownies for about 30-35 minutes. To check if they are done, insert a toothpick in the center. It should come out with a few moist crumbs. This means you have a fudgy texture. Be careful not to overbake them, as this can make them dry. Once baked, let them cool for 15 minutes before slicing.
Tips & Tricks
How to achieve the perfect fudgy texture
To get that rich, fudgy texture, focus on two main things: your baking time and mixing. Do not overmix the batter. Mix until just combined. A few lumps are okay! Bake for 30 to 35 minutes. The toothpick test is key. It should come out with a few moist crumbs, not clean. This tells you the brownies stay soft and fudgy.
Storage tips for freshness
To keep your brownies fresh, store them in an airtight container. Line the container with parchment paper for easy removal. If you want them to last longer, place a slice of bread inside. The bread keeps the brownies moist for days. You can also freeze them. Wrap each brownie in plastic wrap, then place them in a freezer bag.
Best practices for evenly distributed fillings
To ensure the Oreo cookies stay even, layer them carefully. Start by spreading half of the brownie batter in the pan. Then, place the Oreo halves with the cream side facing up. This way, they stay centered. When adding the top layer of batter, spread it gently. Avoid pushing the cookies down too much.
Enhancing flavor with additional mix-ins
Want to elevate your brownies? Consider adding mix-ins! Chocolate chips are a great choice for extra richness. You can also use chopped nuts or a swirl of peanut butter. These add both flavor and texture. Just remember to mix them in gently so your brownies stay thick and fudgy.
Pro Tips
- Use Room Temperature Eggs: This helps the batter mix more smoothly, resulting in a better texture for your brownies.
- Don’t Overmix the Batter: Mix until just combined to keep your brownies fudgy and avoid a cake-like texture.
- Check for Doneness: Insert a toothpick into the center; a few moist crumbs should cling to it for the perfect fudgy brownie.
- Let Them Cool: Allow brownies to cool in the pan for at least 15 minutes before slicing to ensure clean edges and easier handling.
Variations
Different cookie options for stuffing
You can switch up the cookies you use. Try using double-stuffed Oreos for a creamier center. If you love mint, use mint Oreos for a fresh twist. You can also use peanut butter Oreos for a nutty flavor. Each cookie adds a unique taste to the brownies.
Adding nuts or other chocolates
Mix in some nuts for crunch. Chopped walnuts or pecans add a nice texture. You can also add different chocolates. Toss in white chocolate chips or dark chocolate chunks for more richness. This gives the brownies an extra layer of flavor and fun.
Adjusting sweetness for dietary preferences
You can change the sugar levels to suit your taste. Use less sugar for a less sweet brownie. For a healthier option, try using coconut sugar or a sugar substitute. You can also reduce the amount of Oreo cookies if you want fewer sweets. This lets you enjoy the chocolatey goodness while keeping it balanced.
Storage Info
How to properly store leftover brownies
To keep your Oreo stuffed brownies fresh, store them in an airtight container. Place a piece of parchment paper between layers to prevent sticking. You can keep them at room temperature for up to three days. If you want to keep them longer, the fridge is a great option. They can last about a week in the fridge. Just remember to bring them back to room temperature before you eat them. This way, they taste even better!
Freezing instructions for longer shelf-life
If you have more brownies than you can eat, freezing is perfect. Start by slicing the brownies into squares. Wrap each square tightly in plastic wrap. Then, place them in a freezer-safe bag or container. They will last up to three months in the freezer. When you’re ready to enjoy them, just take out a square and let it thaw at room temperature. You can also pop them in the microwave for a quick warm-up!
Reheating tips for the best taste
To reheat the brownies without losing their texture, place them in the microwave for about 10-15 seconds. Check if they are warm enough; you can always add a few more seconds. If you prefer an oven, set it to 350°F (175°C). Heat them for about 5 minutes, or until warm. For a special treat, serve them with a scoop of ice cream on top! It adds a nice touch and makes them feel fresh.
FAQs
Can I make Oreo Stuffed Brownies ahead of time?
Yes, you can make these brownies ahead of time. Bake and cool them, then cover tightly with plastic wrap. Store them at room temperature for up to three days. For longer storage, place them in the fridge for up to a week. You can also freeze them for up to three months. Just make sure to thaw them overnight in the fridge before serving.
What can I substitute for butter in this recipe?
If you need a butter substitute, you can use coconut oil or vegetable oil. Both options will keep the brownies moist and rich. You can also try unsweetened applesauce for a lower-fat option. Just remember, this may change the texture a bit.
How do I know when the brownies are fully baked?
To check if your brownies are done, insert a toothpick into the center. If it comes out with a few moist crumbs, the brownies are ready. If it comes out clean, they may be overbaked. The edges should look firm, while the center should remain a bit soft for that fudgy texture.
Can I use gluten-free flour for this recipe?
Yes, you can use gluten-free flour in this recipe. Look for a 1:1 gluten-free blend, which usually works well. Make sure it contains xanthan gum for the best texture. The flavor of the brownies will remain rich and delicious, just like the original!
Oreo stuffed brownies are fun and simple to make. You learned about the key ingredients, like room temperature eggs. Mixing the wet and dry ingredients carefully keeps lumps out. Layering is crucial for those tasty Oreo pockets, too. Remember, adjustments can make these brownies perfect for you.
Don’t forget to store leftovers right to keep them fresh. Enjoy experimenting with flavors and textures. These tips will help you create delicious brownies every time. Happy bakin