Craving a sweet treat that’s both healthy and easy to make? Peanut Butter Banana Nice Cream is the answer! With just four ripe bananas and creamy peanut butter, you can whip up a simple delight that feels indulgent. Whether you’re looking for a cool dessert or a delicious snack, this nice cream delivers the flavor you love without the guilt. Let’s dive into this creamy goodness and discover how to create your own!
Why I Love This Recipe
- Deliciously Creamy: This nice cream has a smooth, creamy texture that mimics soft-serve ice cream, making it a delightful treat on a warm day.
- Healthy Indulgence: Made primarily from frozen bananas and natural peanut butter, this recipe is a guilt-free dessert option that satisfies sweet cravings.
- Customizable Toppings: You can easily personalize your nice cream with a variety of toppings like chopped peanuts, dark chocolate chips, or fresh fruit.
- Quick and Easy: With simple ingredients and minimal prep time, this recipe is perfect for a quick homemade dessert that anyone can make.
Ingredients
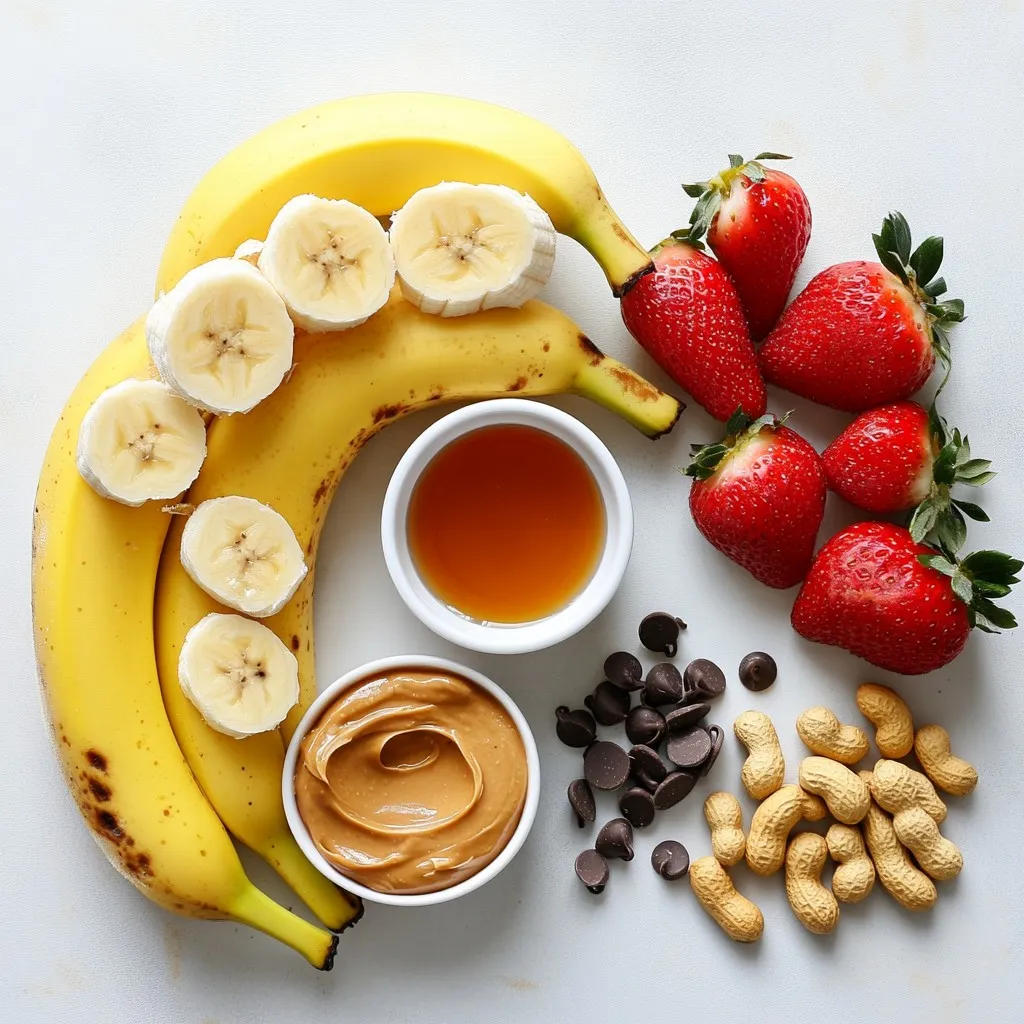
Main Ingredients
– 4 ripe bananas
– 1/2 cup creamy peanut butter
– 1 tablespoon honey or maple syrup (optional)
– 1/2 teaspoon vanilla extract
– A pinch of sea salt
Optional Toppings
– Chopped peanuts
– Dark chocolate chips
– Sliced strawberries
To make Peanut Butter Banana Nice Cream, you need simple yet tasty ingredients. Start with ripe bananas; they add natural sweetness and creaminess. Look for bananas with brown spots. They blend best!
Next, grab creamy peanut butter. It gives a rich flavor and smooth texture. If you want a hint of sweetness, consider honey or maple syrup. Just one tablespoon is enough.
Vanilla extract enhances the taste. A pinch of sea salt balances the flavors. This little touch can make a big difference!
You can customize your nice cream with toppings. Chopped peanuts add crunch. Dark chocolate chips bring a sweet contrast. Sliced strawberries add freshness and color.
Gather these ingredients, and you’re ready to create a delightful treat!
Step-by-Step Instructions
Preparing the Bananas
– Peel and slice bananas.
– Freeze banana slices.
Start by peeling four ripe bananas. Slice them into rounds about half an inch thick. Spread these slices in a single layer on a baking sheet. This way, they won’t stick together. Place the baking sheet in the freezer for at least two hours. You can even freeze them overnight. Frozen bananas give your nice cream that creamy texture we all love.
Blending the Nice Cream
– Process the frozen bananas.
– Add peanut butter and other ingredients.
– Adjust sweetness to taste.
Once your banana slices are solid, put them in a food processor. Pulse the bananas gently. At first, they will look crumbly. Keep blending until they turn creamy, like soft-serve ice cream. This can take several minutes, so be patient. Next, add half a cup of creamy peanut butter, a tablespoon of honey or maple syrup if you like it sweet, half a teaspoon of vanilla extract, and a pinch of sea salt. Blend again until everything is smooth. Taste it and adjust the sweetness if needed.
Finalizing
– Transfer to a container.
– Option for soft-serve or firmer texture.
Now, carefully transfer the nice cream to a loaf pan or an airtight container. Smooth the top with a spatula for a nice finish. If you want soft-serve, enjoy it right away! For a firmer texture, place the container in the freezer for one to two hours. This helps it set perfectly. When you’re ready to serve, scoop it into bowls and add toppings like chopped peanuts, dark chocolate chips, or sliced strawberries for extra flavor and fun!
Tips & Tricks
Choosing the Right Bananas
Choosing the right bananas is key for nice cream. You want ripe bananas for the best flavor and texture. Ripe bananas are sweet and creamy, making your nice cream smooth.
To tell if bananas are ripe enough, look for yellow skin with a few brown spots. These spots show they are sweet. Avoid green bananas as they are not sweet yet.
Achieving the Creamiest Texture
Freezing bananas correctly helps you achieve the creamiest nice cream. First, slice the bananas into rounds. Spread them out on a baking sheet. This step is important. If they touch, they freeze together.
Freeze the slices for at least 2 hours. If you can, freeze them overnight. This ensures they are solid and blend into a creamy texture.
When blending, start with a few pulses. The bananas will look crumbly at first. Keep blending for about 5 to 10 minutes. Stop to scrape down the sides often. Blend until it looks like soft-serve ice cream. This takes time, but the creamy result is worth it!
Pro Tips
- Use Ripe Bananas: The riper the bananas, the sweeter and creamier your nice cream will be. Look for bananas with brown spots for optimal sweetness.
- Freeze in a Single Layer: Make sure to freeze the banana slices in a single layer to prevent them from sticking together, making it easier to blend later.
- Blend Thoroughly: Patience is key! Blend the bananas long enough to achieve a silky texture. Stop occasionally to scrape down the sides for even mixing.
- Experiment with Toppings: Get creative with toppings! Try adding granola, coconut flakes, or your favorite fruits to elevate your nice cream experience.
Variations
Flavor Additions
You can switch up the flavor of your nice cream to keep things exciting. Here are a couple of fun ideas:
– Chocolate Peanut Butter Nice Cream: Just add 1/4 cup of cocoa powder or a few tablespoons of chocolate syrup to the mix. Blend it with the peanut butter and bananas. You’ll love the rich, chocolatey taste!
– Nutty Fruit Blast: Mix in other fruits like strawberries or mango. Just chop them up and add them to the food processor with the bananas. This adds a fresh twist and a burst of flavor.
Dietary Alterations
If you have dietary needs, don’t worry! You can still enjoy this treat.
– Vegan and gluten-free options: The recipe is already vegan if you skip honey and use maple syrup. It’s also gluten-free, so everyone can enjoy it!
– Sugar-free sweetener alternatives: If you want less sugar, use a sugar-free sweetener like stevia or erythritol. Just adjust the amount to your taste. You can still make it sweet without added sugar!
These variations let you play with flavors and meet your dietary needs. Enjoy making it your own!
Storage Info
Best Way to Store Nice Cream
To keep your nice cream fresh, use an airtight container. A loaf pan works well. Just make sure to cover it tightly. This prevents ice crystals from forming. Ice crystals can ruin the creamy texture.
When freezing, spread the nice cream evenly in the container. Leave some space at the top. Liquid expands when frozen. This will help your nice cream stay smooth and creamy.
Shelf Life and Quality
Peanut Butter Banana Nice Cream lasts about one month in the freezer. After that, its taste may fade. You should always check for signs of spoilage.
Look for changes in color or texture. If the nice cream has a grainy feel, it’s time to toss it. An off smell is also a warning sign. Trust your senses to keep your treats fresh!
FAQs
Can I use other nut butters?
Yes, you can use other nut butters. Almond butter and cashew butter work well. They bring their own unique flavors. Each nut butter offers a slightly different taste. You can also try sunflower seed butter for a nut-free option.
Is this recipe suitable for children?
Yes, this nice cream is great for kids. It has healthy ingredients like bananas and peanut butter. Bananas provide potassium, while peanut butter gives protein. This treat is sweet but not too sugary. You can adjust sweetness by using less honey or maple syrup.
Can I make this nice cream without a food processor?
Yes, you can use a blender instead. Just make sure to cut the frozen bananas into smaller pieces. You may need to stop and scrape the sides often. Another option is to use a fork for mashing. It will take longer but can work in a pinch.
To sum it up, we explored how to make creamy, delicious nice cream using just ripe bananas and peanut butter. You learned the steps for perfecting your blend, from freezing bananas to adding tasty toppings. With tips for texture and storage, you can enjoy this treat anytime. Whether you stick to the basics or try variations, nice cream is fun and tasty. Enjoy creating your version and share it with friends and famil