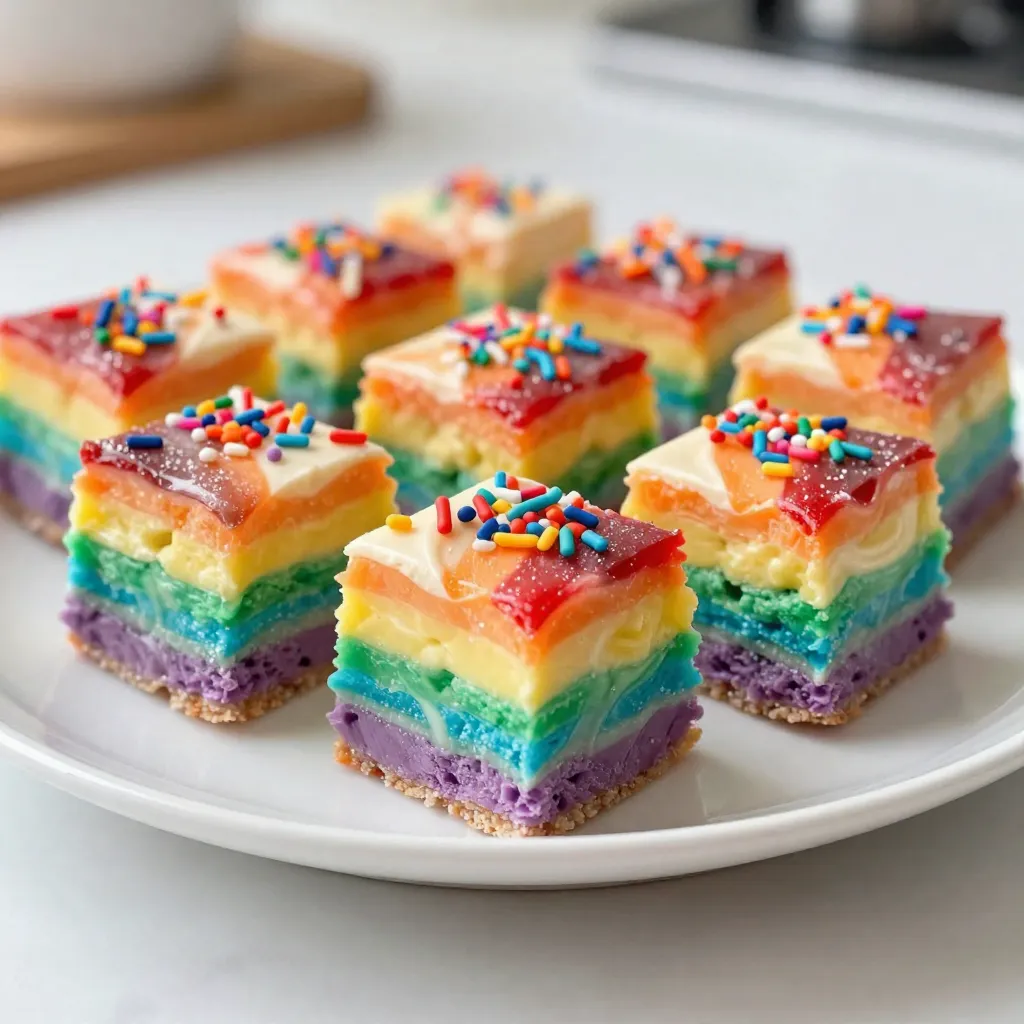
Get ready to make the sweetest, most colorful treat you’ve ever seen! In this blog post, I’ll show you how to whip up Rainbow Unicorn Fudge. With bright layers of fun colors and tasty flavors, this fudge is perfect for parties or just a fun snack. From the ingredients list to storage tips, I’m here to guide you every step of the way. Let’s dive in and create this delightful treat!
Why I Love This Recipe
- Colorful Appeal: This fudge is a feast for the eyes with its vibrant layers, making it perfect for parties and celebrations.
- Easy to Make: With just a few simple ingredients and steps, this recipe is accessible for bakers of all skill levels.
- Customizable Fun: You can easily change the colors or add different toppings to suit any occasion or personal preference.
- Deliciously Sweet: The combination of white chocolate and rainbow sprinkles creates a delightful treat that pleases both kids and adults alike.
Ingredients
Main Ingredients Needed
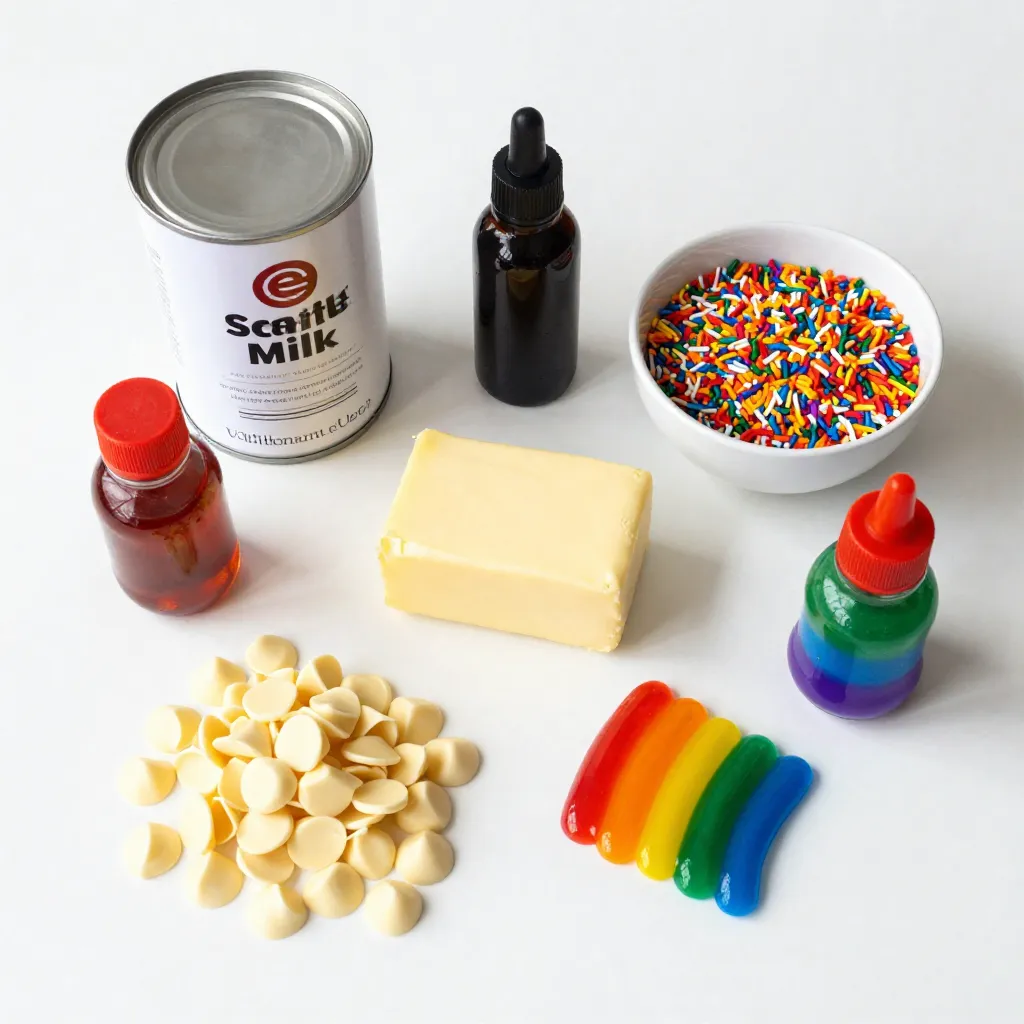
To make Rainbow Unicorn Fudge, gather these key ingredients:
– 2 cups white chocolate chips
– 1 can (14 oz) sweetened condensed milk
– ½ cup unsalted butter, cubed
– ½ teaspoon vanilla extract
These ingredients form the base of your fudge. The white chocolate brings a creamy texture, while sweetened condensed milk adds sweetness. Butter adds richness, and vanilla extract boosts flavor.
Gel Food Coloring Options
For the bright colors, use gel food coloring. I recommend these shades:
– Red
– Orange
– Yellow
– Green
– Blue
– Purple
Gel food coloring works best because it gives you vibrant colors without adding too much liquid. This keeps your fudge thick and creamy.
Suggested Toppings and Garnishes
To make your fudge even more fun, consider these toppings:
– ¼ cup rainbow sprinkles
Sprinkles add a playful touch. You can also try mini marshmallows or crushed candies for extra texture. Feel free to be creative and add your favorite treats!
Step-by-Step Instructions
Preparation of Baking Pan
To start, grab an 8-inch square baking pan. Line it with parchment paper. Make sure the paper hangs over the sides. This helps you lift the fudge out easily once it sets.
Melting the Fudge Base
Next, find a medium saucepan. In it, mix together 2 cups of white chocolate chips, 1 can of sweetened condensed milk, and ½ cup of cubed unsalted butter. Set the pan on low heat. Stir gently as it melts. This should take about 5 minutes. Keep an eye on it to avoid burning. Once smooth, remove the pan from heat. Add ½ teaspoon of vanilla extract and stir until mixed in well.
Adding Color and Layering Process
Now, divide the melted fudge into five bowls. Each bowl should have an equal amount. In the first bowl, add red gel food coloring. In the second, put in orange. For the third, add yellow, and for the fourth, green. In the last bowl, use blue and purple. Mix well until each color is bright and vibrant.
It’s time to layer the fudge! Start with the first color. Spoon it into the prepared pan. Use a spatula to spread it evenly. Repeat this for each color, layering them one on top of the other. After you add all the colors, take a toothpick or skewer. Gently swirl through the layers. Be careful not to mix them too much; you want to see the colors!
Before the fudge sets, sprinkle ¼ cup of rainbow sprinkles on top. This adds a fun touch! Place the pan in the refrigerator. Chill it for at least 2 hours or until firm. When ready, lift the fudge out using the parchment paper. Cut it into 16 squares, and enjoy your colorful treat!
Tips & Tricks
Achieving Vibrant Colors
To get bright colors, use gel food coloring. Gel colors give you more control than liquid. Start with a small drop and mix well. Add more until you reach your desired shade. Each color should stand out in your fudge. Red, orange, yellow, green, blue, and purple create a lovely rainbow effect.
Perfecting the Swirl Technique
Swirling is key for a pretty look. After layering your fudge, grab a toothpick or skewer. Dip it into the fudge and gently swirl it through the layers. Be careful not to mix too much! You want to keep the colors visible, not blend them into one. A few gentle swirls work wonders.
Storage Tips for Freshness
Keep your fudge fresh by storing it properly. Place it in an airtight container after it cools. This helps maintain its soft texture. If you want to keep it longer, refrigerate it. It can last for up to two weeks in the fridge. Just remember to cut pieces as you go to prevent drying out.
Pro Tips
- Use Quality Chocolate: Opt for high-quality white chocolate chips for a creamier texture and better flavor in your fudge.
- Gel Food Coloring: Use gel food coloring instead of liquid for vibrant colors that won’t alter the consistency of the fudge.
- Swirling Technique: When swirling the colors, do it gently and minimally to maintain the distinct layers and achieve a beautiful marbled effect.
- Storage Tips: Keep the fudge in an airtight container in the refrigerator for up to two weeks to maintain its freshness.
Variations
Flavor Variations for Fudge
You can mix up the flavor of your Rainbow Unicorn Fudge. Try using dark chocolate chips instead of white chocolate. This change gives a rich taste that pairs well with the sweet layers. You can also add flavors like mint or orange by using flavored extracts. Just a few drops can transform your fudge into a new treat.
Alternative Toppings and Mix-Ins
Toppings add fun to your fudge. Instead of rainbow sprinkles, you can use crushed nuts, mini marshmallows, or even colorful candy pieces. For a tropical twist, top with shredded coconut. If you want something tart, try adding dried fruit like cranberries or cherries. Mix-ins can include chocolate chips, cookie crumbs, or even a swirl of peanut butter for extra flavor.
Vegan and Dairy-Free Adaptations
Making this fudge vegan is easy. Substitute white chocolate chips with dairy-free chocolate chips. Use coconut milk instead of sweetened condensed milk. You can also swap the butter for coconut oil or a vegan butter. This way, everyone can enjoy the magic of Rainbow Unicorn Fudge without dairy.
Storage Info
Best Practices for Storing Fudge
To keep your Rainbow Unicorn Fudge fresh, store it in an airtight container. This helps prevent it from drying out. Make sure to place a layer of parchment paper between the fudge and the lid. This will keep the fudge from sticking together. Keep the container in a cool, dry place. Avoid storing it near heat sources or in direct sunlight.
How to Freeze Rainbow Fudge
Freezing Rainbow Unicorn Fudge is easy! Start by cutting the fudge into squares. Wrap each piece in plastic wrap to protect it. Then, place the wrapped fudge in a freezer-safe bag. Squeeze out as much air as you can. You can freeze the fudge for up to three months. When you’re ready to enjoy it, let it thaw in the fridge for a few hours.
Duration for Freshness and Taste
Rainbow Unicorn Fudge stays fresh for about one week at room temperature. If you keep it in the fridge, it can last up to two weeks. Freezing extends its life, but the taste may change slightly after a few months. Always check for any off smells or changes in texture before eating. Enjoy your colorful treat!
FAQs
Can I use other types of chocolate?
Yes, you can use dark or milk chocolate. Each type gives a different flavor. Dark chocolate adds a rich taste. Milk chocolate makes the fudge sweeter. Remember to adjust the sweetness so it balances well.
How long does the fudge last?
The fudge can last about two weeks. Store it in an airtight container. Keep it in a cool place. If you put it in the fridge, it can last even longer. Just be sure it is sealed well.
Can I make this fudge without food coloring?
Absolutely, you can skip the food coloring. The fudge will still taste great. It will be a simple white fudge. You can add flavors like nuts or vanilla for a twist.
You now have all the tools to make delicious rainbow fudge. We discussed key ingredients, the step-by-step process, and helpful tips. You learned about vibrant colors, swirl techniques, and how to store your fudge. Plus, we explored fun variations to suit any taste.
Enjoy your fudge-making adventure. Remember, practice makes perfect. Your friends and family will love your tasty creation