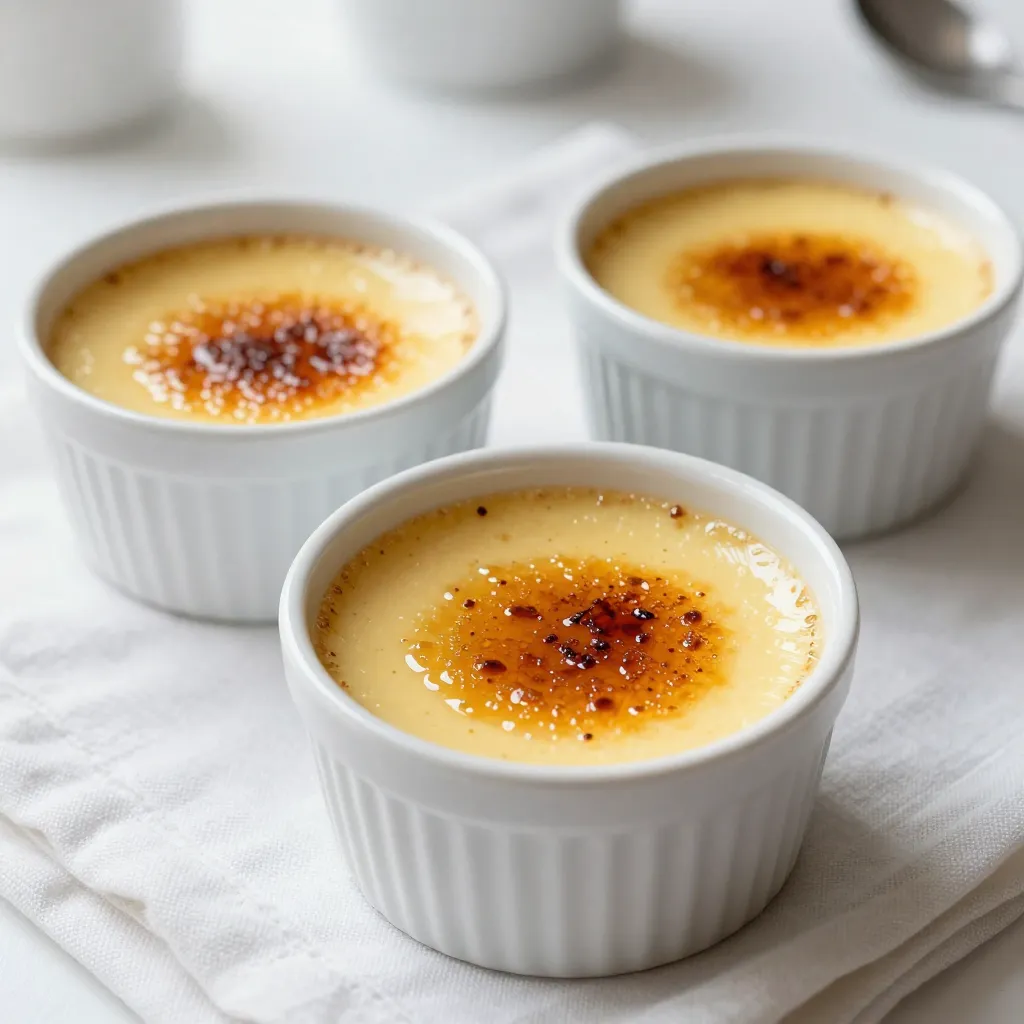
Crème brûlée is a classic dessert that never goes out of style. Today, I’m excited to share a smooth and creamy vanilla bean version that’s sure to impress. From fresh vanilla beans to a crisp caramel topping, each bite offers pure delight. Whether you’re a beginner or an expert, my step-by-step guide will make this treat both easy and fun to create. Let’s dive into the sweet world of crème brûlée!
Why I Love This Recipe
- Decadent Flavor: The combination of fresh vanilla bean and cream creates an indulgent dessert that is rich and aromatic.
- Impressive Presentation: The crispy caramelized sugar topping provides a beautiful contrast to the smooth custard, making it visually stunning.
- Customizable: Feel free to experiment with different flavors like chocolate or citrus zest for a unique twist on the classic recipe.
- Perfect for Any Occasion: This elegant dessert is ideal for dinner parties, holidays, or simply when you want to treat yourself.
Ingredients
Main Ingredients for Vanilla Bean Crème Brûlée
– 2 cups heavy cream
– 1 fresh vanilla bean (split and seeds scraped)
– 1/2 cup granulated sugar
– 4 large egg yolks
– 1 teaspoon pure vanilla extract
Additional Ingredients for Caramelized Topping
– Additional granulated sugar
The main ingredients create a rich and smooth texture. Heavy cream brings creaminess, while the fresh vanilla bean adds a pure flavor. Granulated sugar sweetens the custard and helps form the crunchy top. Egg yolks enrich the custard, giving it that perfect velvety feel. The pure vanilla extract enhances the flavor, making each bite delightful.
For the topping, you need more granulated sugar. This sugar caramelizes to form a crisp layer. It contrasts beautifully with the soft custard beneath. When done right, it adds a satisfying crunch. Together, these ingredients make a classic dessert that everyone loves.

Step-by-Step Instructions
Preparation Steps
– Preheat the oven to 325°F (160°C).
– Infuse the cream with vanilla flavor. To do this, heat the heavy cream with the split vanilla bean and its seeds in a saucepan. Stir occasionally. Once it simmers, take it off the heat. Let it steep for 15 minutes for a rich vanilla taste.
Mixing and Baking Process
– Whisk egg yolks and granulated sugar. In a bowl, mix the egg yolks with sugar until the mixture turns pale and thick.
– Combine mixtures and strain for smoothness. Slowly pour the warm cream into the egg yolk mix, stirring gently. Discard the vanilla pod afterward to keep your custard smooth.
– Prepare ramekins and create a water bath. Divide the mixture into six ramekins. Place them in a baking dish and fill it with hot water, halfway up the sides of the ramekins.
– Bake in the oven. Put the baking dish in the oven and bake for 30 to 35 minutes. The edges should be set, but the centers should jiggle slightly.
Cooling and Caramelizing
– Cool and chill the custard. After baking, remove the ramekins from the water bath. Let them cool to room temperature. Then refrigerate for at least 2 hours, or overnight for best results.
– Caramelize the sugar topping. Just before serving, sprinkle a thin layer of sugar on top. Use a kitchen torch to melt the sugar until it forms a crisp crust. If you don’t have a torch, put them under a broiler for 1-2 minutes. Watch closely to avoid burning!
– Serve the dessert. Let the Crème Brûlée sit for a few minutes after caramelizing. This allows the sugar to harden. Present it beautifully, perhaps with fresh berries or mint for a touch of elegance.
Tips & Tricks
Achieving the Perfect Custard Texture
A water bath is key. It helps cook the custard gently. This method keeps the heat even and prevents curdling. You want the outside to set while the inside remains creamy.
Signs of doneness are clear. The edges will be set, and the center will jiggle slightly. If it looks too firm, it may overbake. A perfect custard should wiggle just a bit.
Caramelization Techniques
Using a kitchen torch gives you control. Move the torch in small circles. This way, you get a nice, even crust. Watch closely to avoid burning.
If you use a broiler, keep an eye on it. Place the ramekins under the broiler for just 1-2 minutes. The sugar caramelizes fast. You want a golden color, not dark brown.
Presentation Suggestions
Garnishing can elevate your dish. Fresh berries or a sprig of mint add color and flavor. Place each ramekin on a nice plate to impress your guests.
For the best experience, serve it chilled. Let the sugar crust harden before serving. This adds a satisfying crack when you dig in with a spoon.
Pro Tips
- Use Fresh Vanilla Beans: The flavor of fresh vanilla beans is unparalleled, giving your crème brûlée an exquisite aroma and taste that vanilla extract alone cannot achieve.
- Perfect Water Bath: Ensure the water reaches halfway up the sides of the ramekins to maintain even baking and prevent the custard from curdling.
- Chill Thoroughly: Allow the custards to chill for at least 2 hours, but overnight is best, as this helps achieve the perfect creamy texture.
- Caramelize with Care: When using a kitchen torch, move it in a circular motion to evenly caramelize the sugar without burning it; if using a broiler, keep a close eye to avoid overcooking.
Variations
Flavor Variations
– Chocolate Vanilla Bean Crème Brûlée: To make this variation, add 4 ounces of melted dark chocolate to the cream. Stir well before mixing with the egg yolks. The rich chocolate enhances the vanilla, creating a delightful contrast.
– Coffee Infused Crème Brûlée: For coffee lovers, steep 1 cup of brewed coffee with the cream instead of plain cream. This change adds a nice depth and aroma to the dessert. Make sure to strain well to remove any coffee grounds.
– Citrus Zest Options: Zest a lemon or orange and add it to the cream while it heats. The citrus zest adds a fresh, bright note. Just remember to strain the mixture to keep it smooth.
Dietary Alternatives
– Dairy-free alternatives for cream: Use coconut cream or almond milk to replace heavy cream. Both options work well and still give a creamy texture. Make sure to choose unsweetened versions for best results.
– Vegan options for egg replacement: Use a mix of silken tofu or a commercial egg replacer in place of egg yolks. Blend until smooth and follow the recipe as usual. This keeps the creamy texture without using eggs.
Storage Info
Storing Leftover Crème Brûlée
To store leftover Crème Brûlée, keep it in the fridge. Place plastic wrap over each ramekin. This keeps the custard fresh and avoids drying. Make sure the wrap does not touch the custard. The sugar topping can get soggy if covered. For best results, store the custard and sugar separately.
Freezing Guidelines
Can you freeze Crème Brûlée? I do not recommend freezing it. Freezing affects the creamy texture. It can cause the custard to separate. If you must freeze it, wrap the ramekins tightly. Use plastic wrap and then foil for extra protection.
For safe thawing, move the frozen custard to the fridge. Let it thaw overnight. Do not use the microwave. This can ruin the texture. After thawing, add fresh sugar and caramelize it again. Enjoy your smooth dessert!
FAQs
What is the history of Crème Brûlée?
Crème Brûlée has roots in France, dating back to the 17th century. It is a dessert that features a rich custard base topped with a hard caramel layer. Many countries have their own versions. The Spanish call it “Crema Catalana,” which uses cinnamon and lemon zest. The British have a version called “Trinity Cream,” made with orange zest. Each variation shows how this dessert has inspired many cooks.
How long does homemade Crème Brûlée last?
Homemade Crème Brûlée lasts about three to four days in the fridge. Store it in an airtight container to keep it fresh. If you have already caramelized the sugar, it’s best to eat it right away. The hard sugar layer will soften over time. To enjoy the best texture, do not caramelize the sugar until you are ready to serve.
Can you make Crème Brûlée without a torch?
Yes, you can make Crème Brûlée without a torch. An oven broiler works well for caramelizing sugar. Just sprinkle sugar on top of the custard and place it under the broiler. Keep a close eye on it, as it can burn quickly. Rotate the ramekins if needed to ensure even caramelization. This method gives you a lovely, crunchy topping without a torch.
This blog post covered the essentials of making a perfect vanilla bean crème brûlée. You learned about the key ingredients, including heavy cream and fresh vanilla beans. We explored step-by-step instructions and vital tips for the best texture and caramelization. You can even try delicious variations and proper storage methods.
In conclusion, with patience and practice, you can create this delightful dessert at home. Enjoy impressing friends and family with your new skill